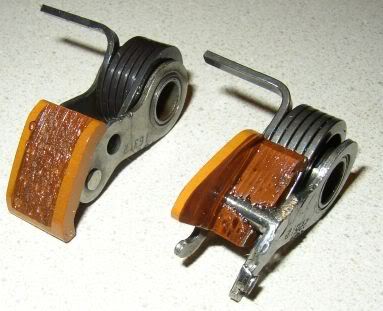
This is what the tensioner pads look like if they have reached their service limits. You can see that the outer pad is okay and within service limits, and the other has been used up completely, with the shoe totally gone, and shards of metal lost from the tensioner into the motor. Not Pleasant! Follow the steps below for installation.
Step 1:
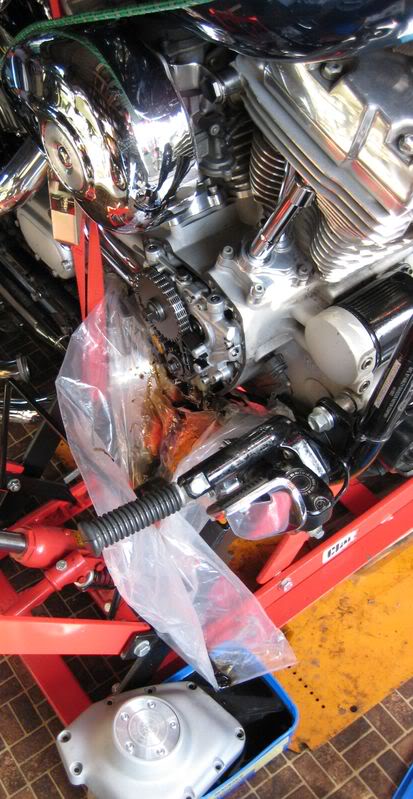
First you need to take off the front exhaust, to get at the cam box. Stuff an oily rag in the exhaust port. Next fit a polythene between the lower half of the cam box and the lower frame rails, and shape it to form a trough that will direct oil to your drain can. There is always some residual oil left in the cam box, and it's enough to make quite a mess. Slacken the cam box with allen bolts a little at a time in a diagonal sequence (to prevent distortion) then remove completely. If you leave the top two until last it stops the cover falling off until you're ready. Congratulate yourself on your forethought as a pint of dirty oil streams down your polythene.
Step 2:
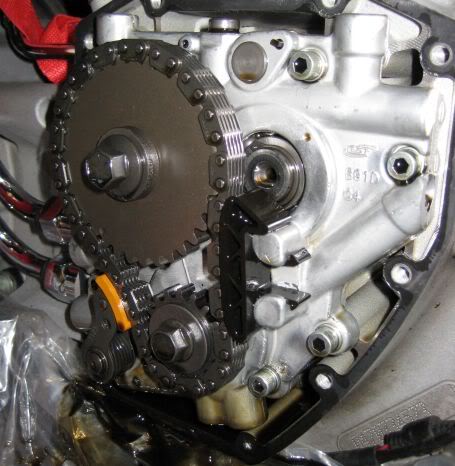
This is what the inside of the cam box looks like. There is a cam plate which supports the outer shafts of the two cams and houses the main oilway to and from the oil pump. The small gear from the crankshaft drives the rear cam, and behind the cam plate, there is a secondary chain, where the front cam is driven by the rear cam.
Step 3:
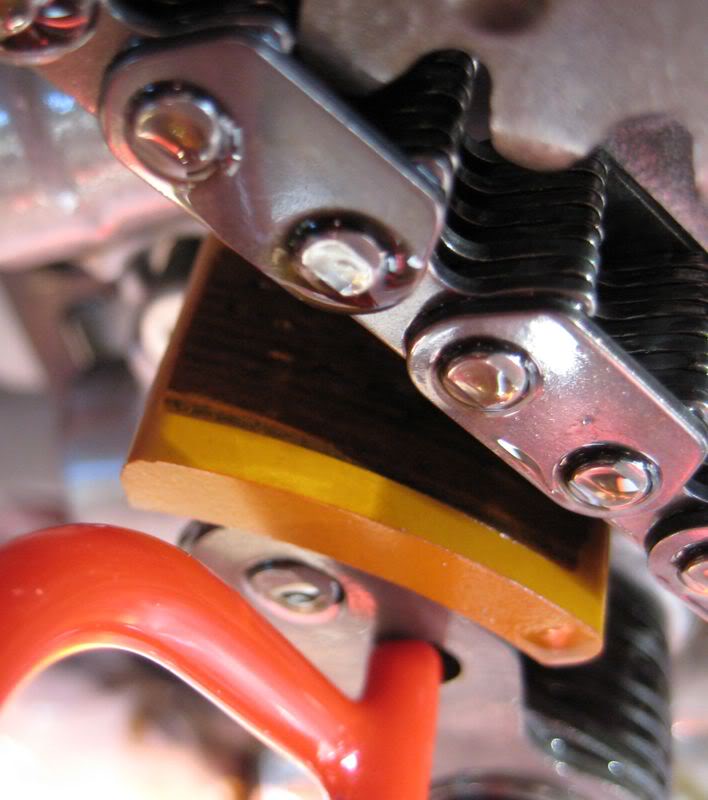
The Primary Cam Chain is tensioned with a spring-loaded shoe bearing on the outer faces of the chain
Step 4:
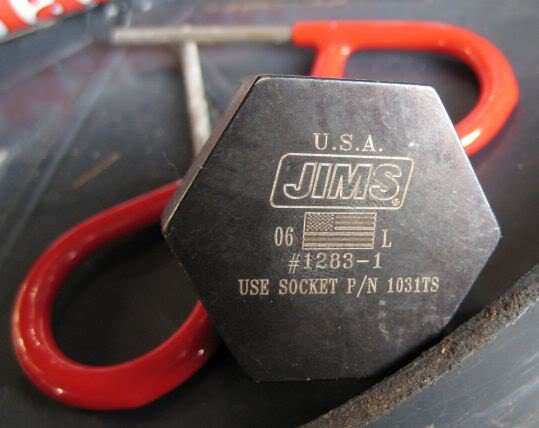
To inspect the shoe properly you need to overcome the tension on the spring and pull the shoe away form the chain. Having done that you can fit a retention pin to hold it in place. We recommend a special tool from Jims which comprises a specail socket and the two retaining pins.
Step 5:
Having used it, it's an overkill for this job, but as you have to be really careful not to let the tensioner spring back on to the chain (which can take your finger off, or shatter the shoe) and it's needed if you ever do a cam or cam bearing change. The instructions aren't good and it's not clear how the unloader is supposed to fit on to the shoe. It will go on two ways. There's a bit of metal that extends out to the hexagon drive flats, and that's supposed to go below the lower right of the shoe. You need a huge 1-1/4" socket or spanner to rotate the tool. We used a 32mm socket which is close enough.
Step 6:
Once you have rotated the shoe anti-clockwise, the hole in the tensioner will align with the hole in the cam plate under the "H."
Step 7:
Push one of the pair of retaining pins in the kit through the tensioner and into the hole in the cam plate.
Step 8:
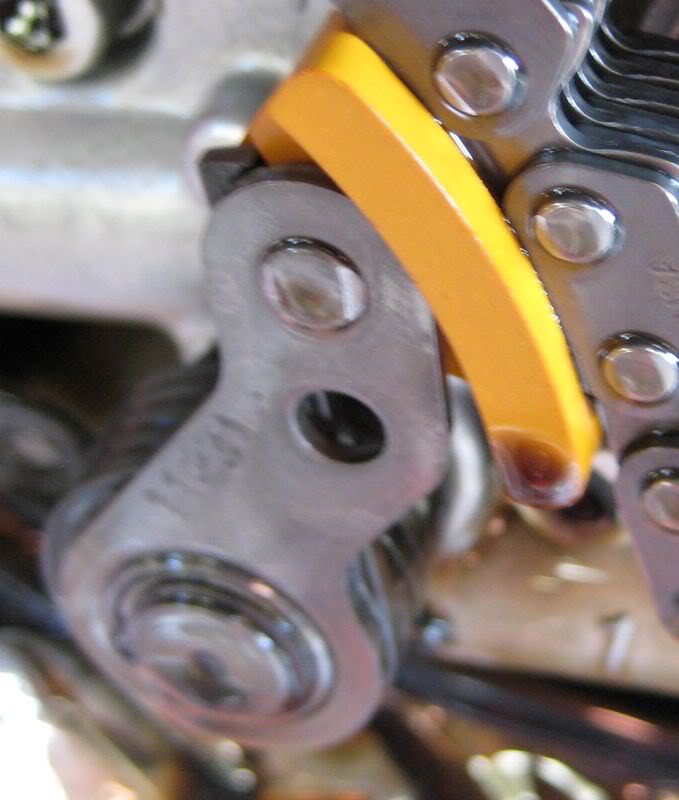
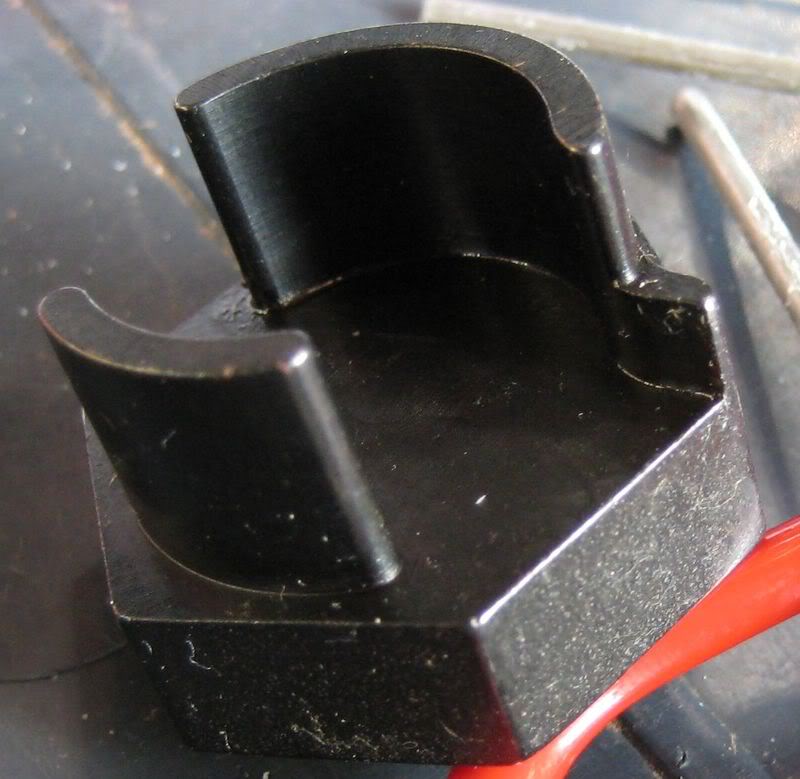
Now you can inspect the shoe which needs to be replaced if more than half the thickness is gone.
Step 9:
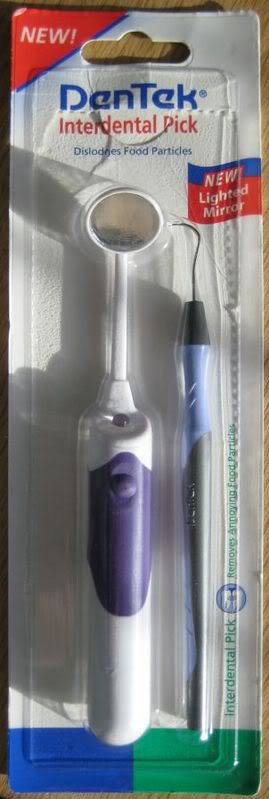
It would be easy to say, "Well, the outer one is okay, so the inner one will be too" but if you wind back to the first picture you can see why that's not a good idea. At this time, I haven't managed to get a view of the rear tensioner. It would be easy if I took off the cam plate, but that involves removing the push rods, and a whole lot more hassle that I'm not ready for. Buy a small dental mirror that hopefully will let you see enough.
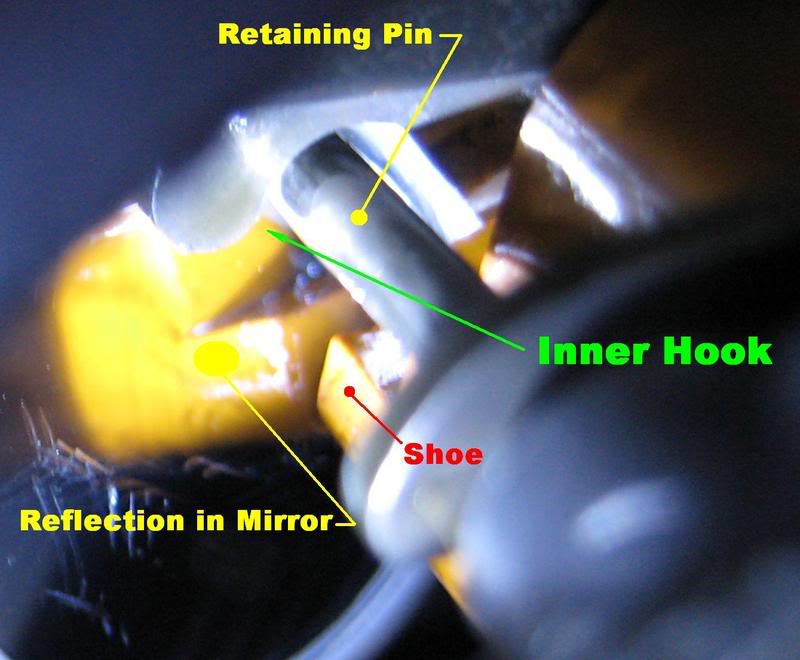
Step 10:
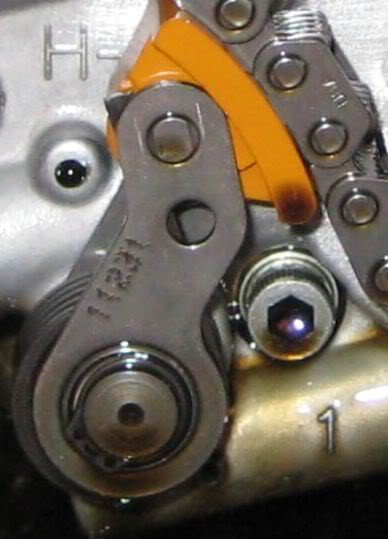
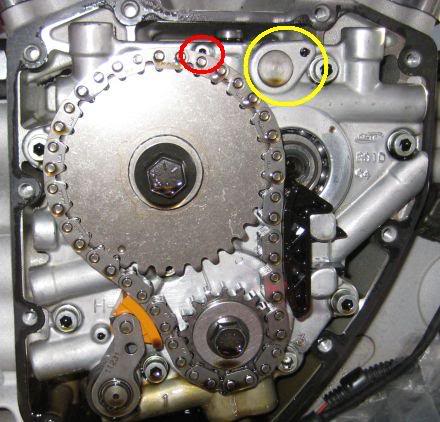
The tensioner sits behind the cam plate and its axle is shown under the yellow ring. The red ring shows the hole where the retaining pin fits.
Step 11:
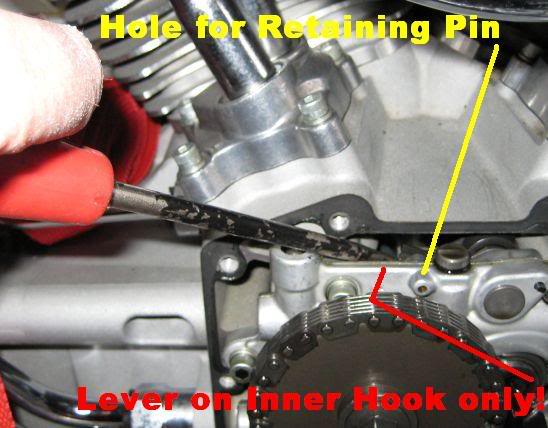
Using the mirror, you can locate the two hooks on the tensioner. These are what the retaining pin fits through when the tensioner is disengaged so you slip a sturdy and long flat bladed screwdriver under the rear one. Lever it up and stick the retaining pin through until it supports the tensioner under the outer hook.
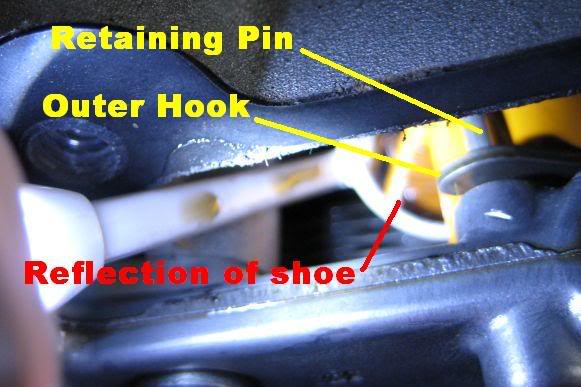
Step 12:
Push the pin in as far as it will go and then remove the screwdriver and push the pin through the rear hook to secure the tensioner.
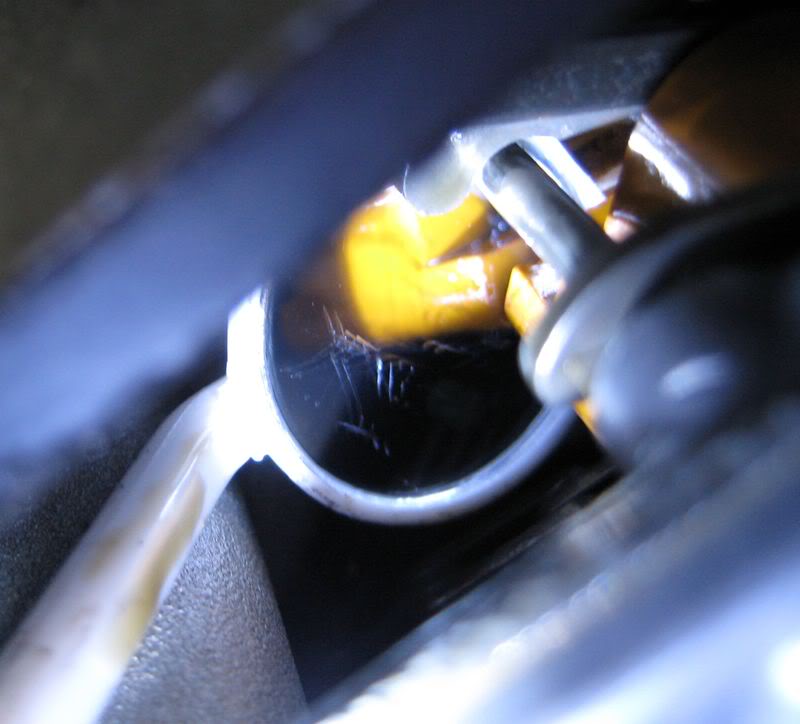
Step 13:
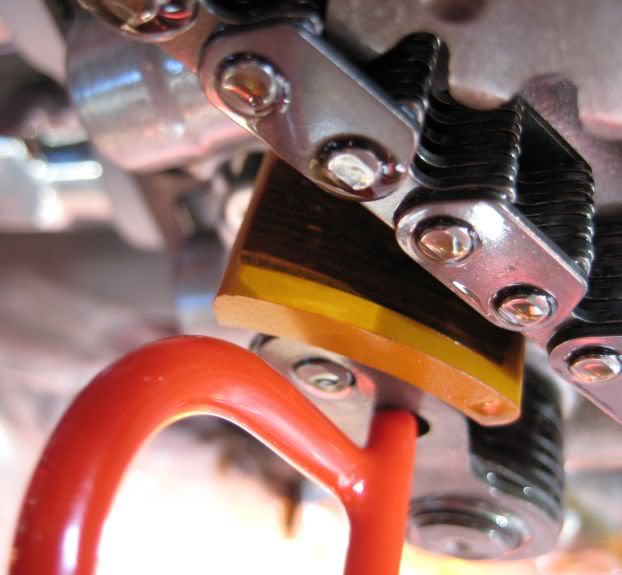
This is what it looks like inside.
Step 14:
With the tensioner secured you are free to use the mirror to inspect the underside of the shoe.
Step 15:
When you're finished get the mirror in there again and support the tensioner again under the rear hook. Keeping it supported withdraw the retaining pin and gently lower the shoe back on to the chain. Degrease and clean the outer cam cover, remove old gasket, and clean faces. Fit new gasket then replace cam cover and torque down the allen bolts in the sequence illustrated in your service manual.